I accidentally lost an important office document from my Windows PC. Is there any data recovery method that I can try to recover my lost Word file?
Losing a Word document can be a terrible situation, especially if it contains valuable information. Whether your Word file is deleted due to accidental deletion, formatting, system crashes, or any other reason, data recovery is possible in every case. In this article, we will discuss different Windows data recovery methods – both built-in tools and third-party professional data recovery software – that can help you recover lost Word files in Windows quickly and effectively.
Common Reasons for Deletion of Word Files on Windows PC
There are many reasons why a Word document may be permanently deleted on your Windows device. Here are a few of them:
- Accidental Deletion
- Device formatting
- System crashes or sudden shutdowns
- Interrupted save process
- Disk formatting or partition loss
- Virus or malware attacks
 Identifying the exact cause allows you to choose the most effective recovery strategy.
How do I Recover Lost Word Files? [Quick Methods]
Now that you are familiar with the causes of Word file deletion on your Windows PC, proceed with the easy data recovery workarounds given in this part of the article to get your documents back:
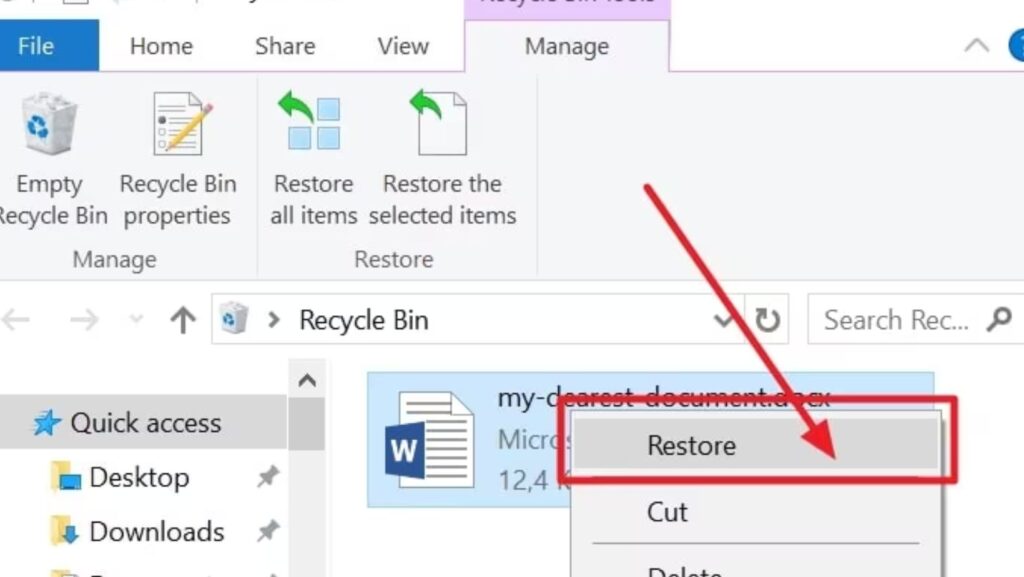
Method 01: Check the Recycle Bin Folder
Every deleted file and folder on your Windows PC goes to the Recycle Bin folder and remains there until permanently removed. You can follow the below steps to recover lost Word files in Windows from the Recycle Bin:
- Launch the Recycle Bin folder from the desktop.
- Locate your deleted Word file.
- When found, right-click on it and select Restore.
Note: Files deleted using the Shift + Delete keys shortcut bypass the Recycle Bin and won’t appear here.
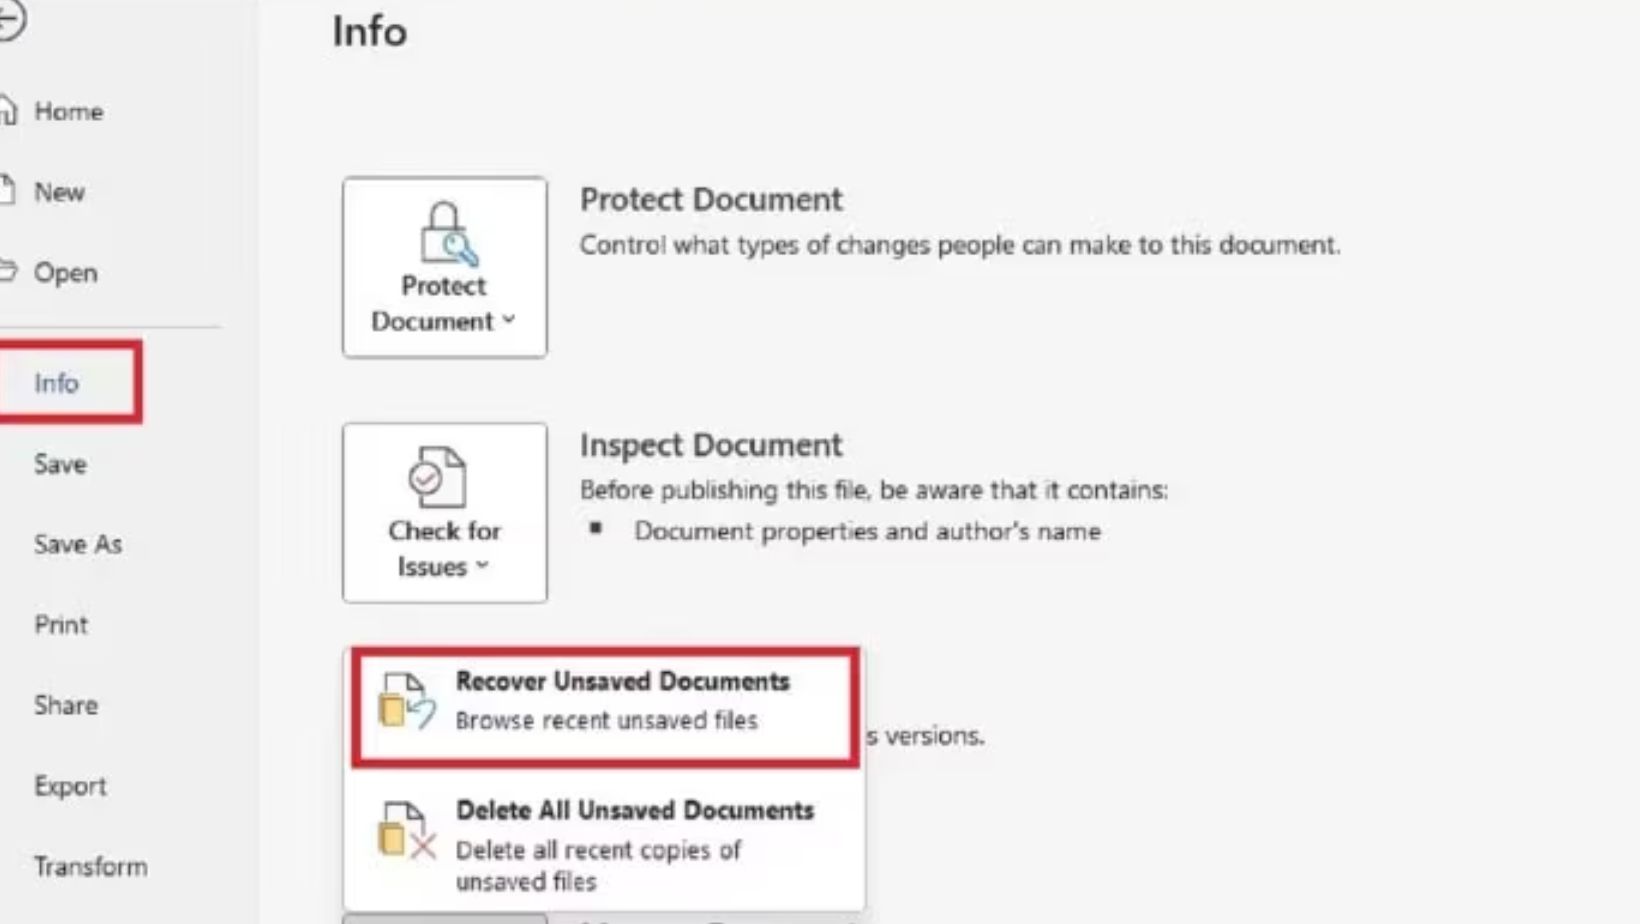
Method 02: Use MS Word AutoRecover Feature
Microsoft Word provides a built-in AutoRecover feature, which, when enabled on your device, automatically saves your file at a regular interval. 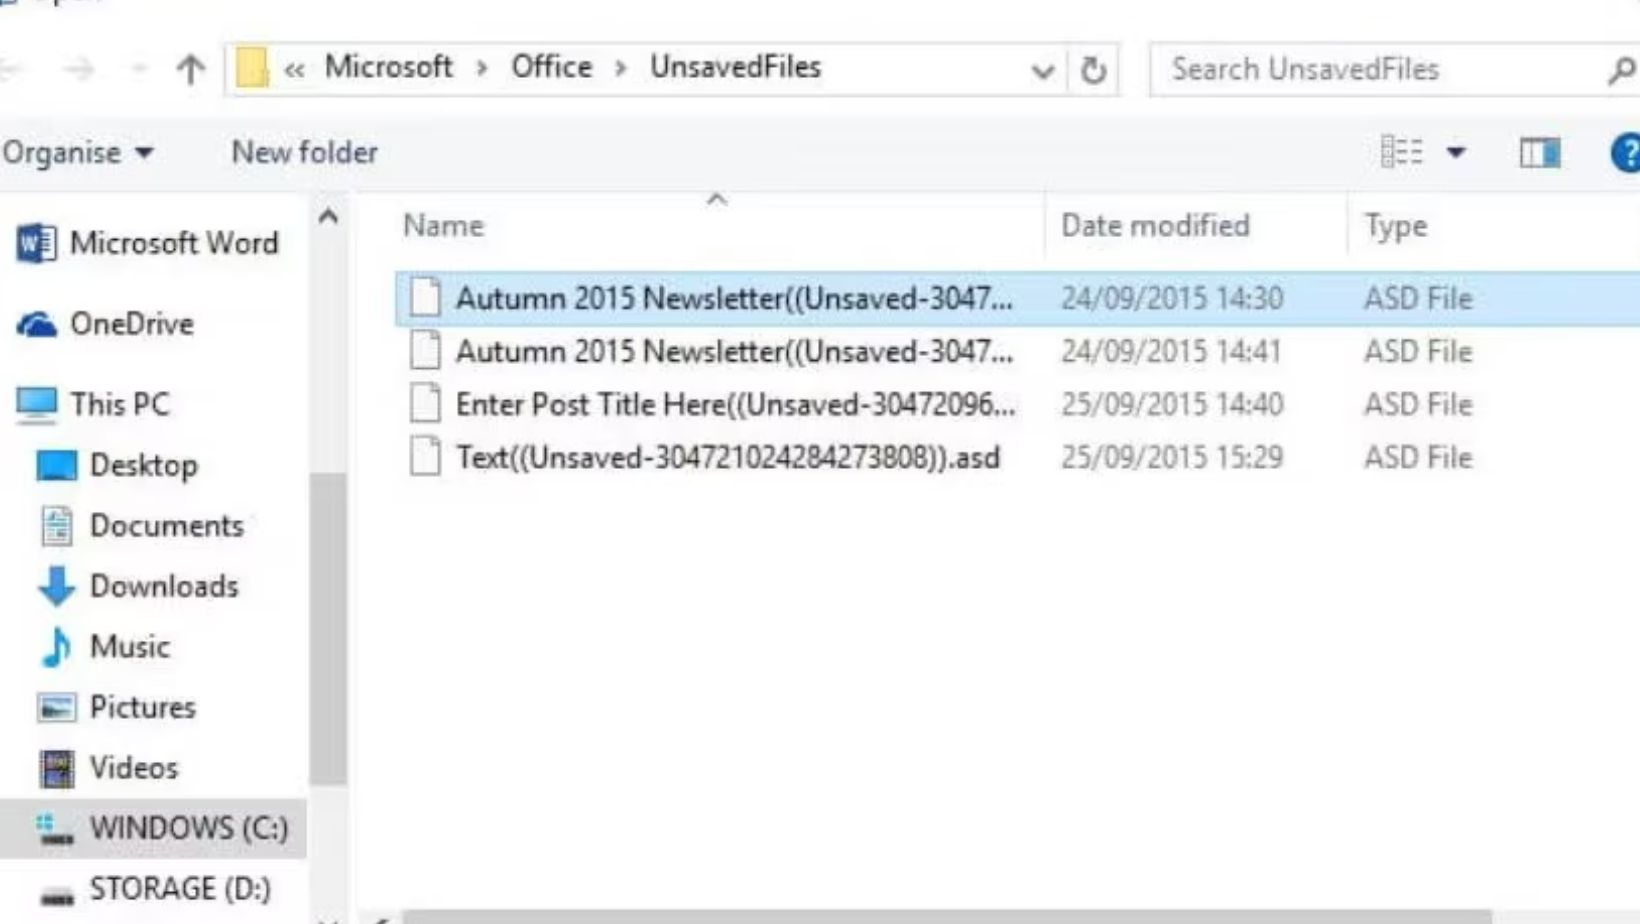 If Word crashes or the system shuts down unexpectedly, the AutoRecover feature can be a lifesaver. To restore your Word file:
- Open Microsoft Word.
- Go to File, click on Info > Manage Document > Recover Unsaved Documents.
- Now, a folder with unsaved documents will appear on your screen.
- Open the file you want to restore and save it immediately.
Here’s how to enable the AutoRecover option:
Go to File, select Options > Save.
Check if the “Save AutoRecover information every X minutes” option is selected. If not, select it.
Lastly, enable “Keep the last AutoRecovered version if I close without saving.”
Method 03: Search for Temporary Files
Word saves temporary files with a .tmp extension during editing. You can use these files when unexpected data loss occurs on your Windows PC. Here’s how:
- Press the Windows + E keys to launch File Explorer.
- Now, search for your missing file using the following keywords:
- *.tmp OR ~*.doc OR *.asd OR *.wbk
- Also, check the following directories:
- C:\Users\[Your Username]\AppData\Local\Microsoft\Office\UnsavedFiles
- %temp% (type this in the File Explorer address bar)
- If found, open the file and save it back on your device.
Method 04: Recover Using File History (Windows Backup)
If you’ve enabled Windows’ built-in File History backup utility on your device, recovery of a lost Word file can be easy and quick.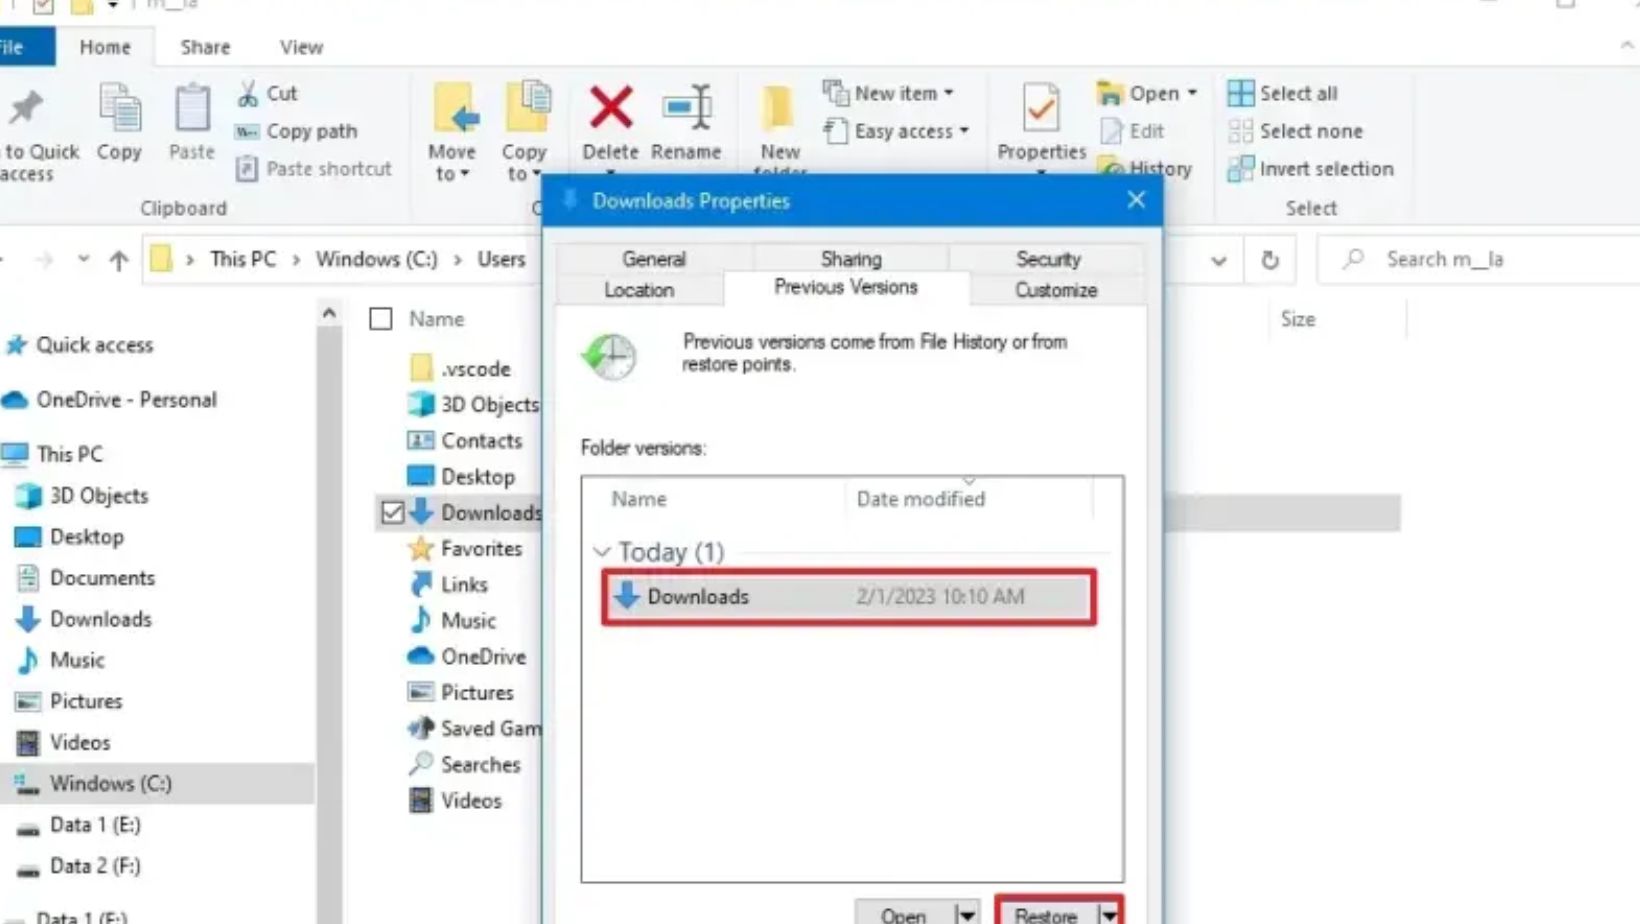 It allows you to recover older versions of your Word documents. All you have to do is:
- Go to the folder where the deleted Word file was earlier saved.
- Right-click anywhere inside the folder and select Properties.
- Navigate to the Previous Versions tab.
- Select an earlier version which you want to recover and click Restore.
If File History is not enabled on your Windows PC, follow the below steps:
- Go to Settings, click on Update & Security and then select Backup.
- Enable Backup using File History and select a drive.
Method 05: Use Third-Party Data Recovery Software
If the above ways to recover lost Word files in Windows fail, use a third-party professional data recovery software like Stellar Data Recovery Professional.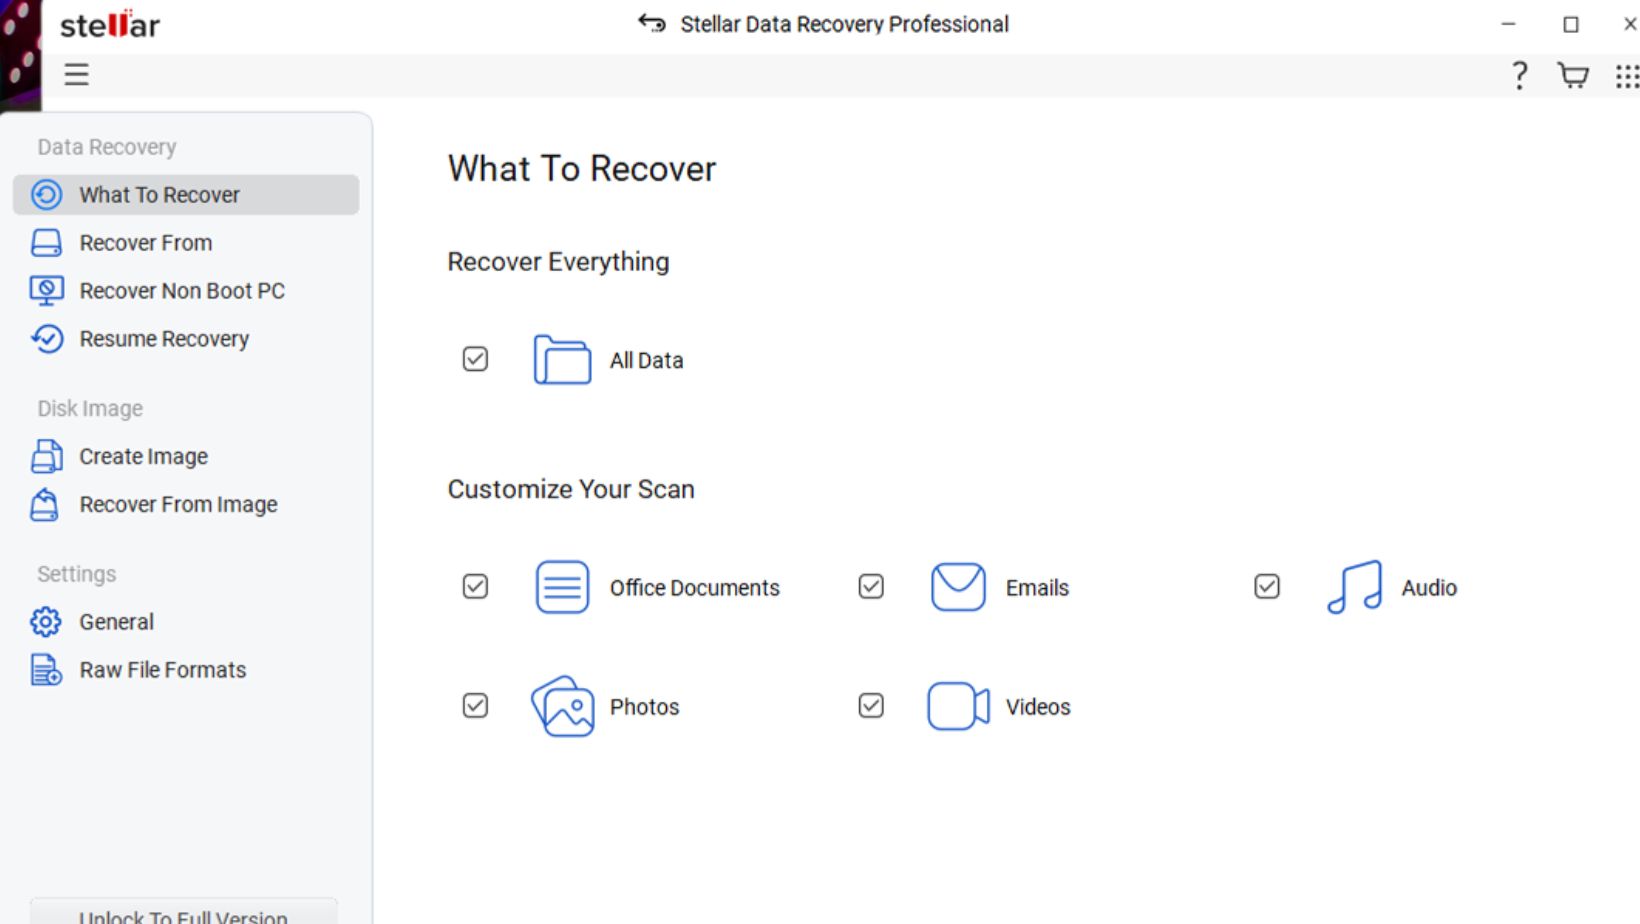 This all-in-one data recovery software supports recovery of Word files lost due to accidental deletion, formatting, virus attacks, or any other reason in a few simple clicks. Along with Word documents, you can use this tool to recover photos, videos, and other types of files in various formats.
Here are quick steps to recover lost Word files using this professional data recovery software:
Step 1: Download and install the Stellar Data Recovery Professional software on your Windows PC. Launch the software and from the “What to Recover” window, choose the type of file you want and click Next.
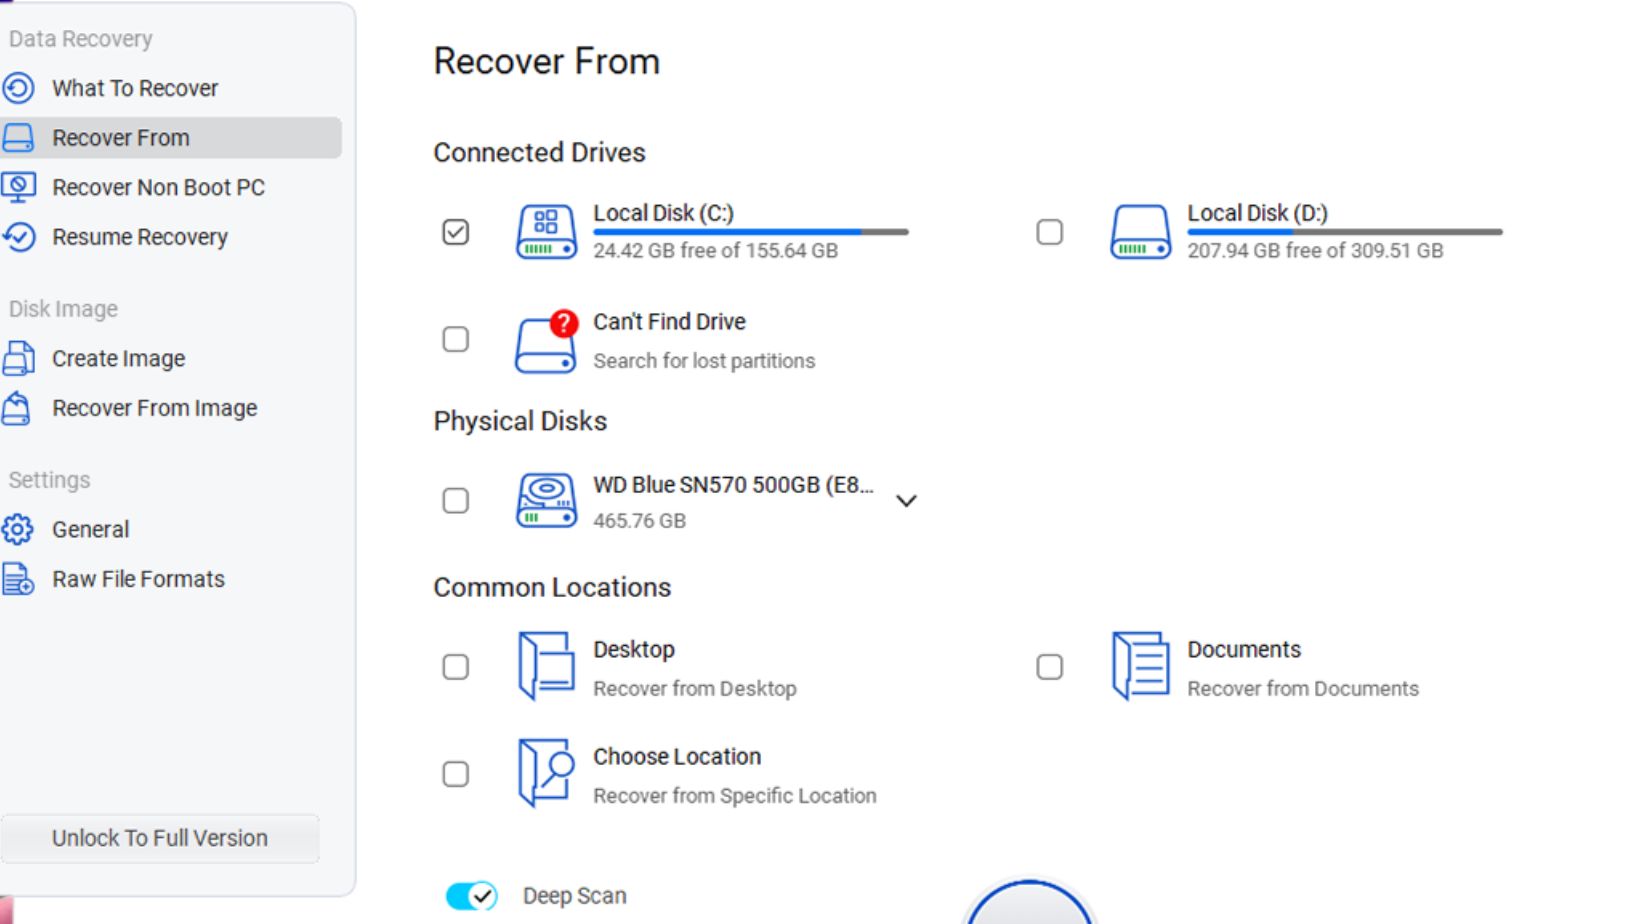
Step 2: Select the folder location where your deleted Word file was earlier stored and click Scan to initiate the scanning process.
 Step 3: Once the scan is complete, preview the recoverable files and click the Recover button to save recovered data at the desired location.
What if the Above Data Recovery Methods Fail?
If all the above ways to recover lost Word files in Windows fail, professional data recovery services can help. These professional services work best if:
- The file loss involves physical damage to your drive.
- The drive is making clicking or grinding noises.
- You suspect malware or ransomware involvement.
Services like Stellar, Ontrack, or DriveSavers offer in-lab recovery for hard drives, SSDs, and USB devices.  Their professional experts can restore your files by performing a comprehensive scan of your storage device.
Conclusion
Losing a Word document doesn’t mean it is lost forever. Whether your file is deleted accidentally or intentionally, Windows and Microsoft Word provide a variety of recovery methods. Start with basic methods such as checking the Recycle Bin folder, using the AutoRecover feature, etc. If you use Word files frequently, then enabling AutoSave, File History, and cloud syncing can help you prevent data loss instances in the future. If all seems to fail, third-party professional data recovery software or recovery services can save you from unnecessary stress and hours of rework. Keep this guide handy so you’re prepared next time disaster strikes.